|
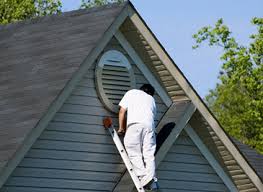
Vinyl siding can be painted successfully with a little planning and know how. Below are the simple steps to follow along with some product suggestions. This process can also be used to paint vinyl shutters and vinyl trim.
DIYpaintGUY
0 Comments
You probably have seen it before, paint peeling off exterior doors, gutters or railings like potato chips. The surface below is a gray colored metal that might have a white powdery surface. This is galvanized metal and needs to be prepped and painted with the proper materials in order for this not to happen. It's not as hard as people think but certain rules need to be followed for a successful paint job. 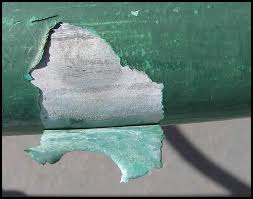 STEP 1: Clean and Prep the Surface The surface needs to be cleaned and prepped before any paint can be applied. New galvanized steel can have oils and chemicals that are applied by the manufacturer to protect the steel. These need to be removed and the steel needs to be dulled/etched for good adhesion. The easiest way to do this is use a product like Krud Kutter Metal Clean & Etch. It will clean and etch the surface at the same time. It is mixed with water and applied with a sprayer or sponge (make sure to wear rubber gloves and safety glasses). Let it sit on the surface for 10 minutes and then rinse with water. This will take care of the prep for new galvanized surfaces. If the galvanized steel is weathered and has a white powdery surface the steps are different. The white powder needs to be removed. This can be usually be achieved by sanding the surface. If it is really bad grinding may be necessary. After the powdery substance is removed it can be cleaned with a water based cleaner like Simple Green. STEP 2: Painting The most important rule to remember when painting galvanized steel is DO NOT USE OIL/ALKYD PAINT. Whether it is primer or paint oil based products will not stick to galvanized surfaces long term. An good acrylic or even epoxy paint will work. In most cases a primer is not even necessary. I would recommend an acrylic dtm product like Sherwin Williams DTM Acrylic. 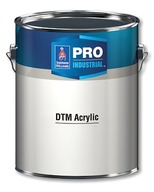 DIYpaintGUY
It happens every year. You put off exterior painting projects until the first cold spell arrives and then it kicks you into gear to start painting outside. Most manufacturers have exterior latex products that can be applied down to 35 degrees. Sounds good right, but the problem is the temperature needs to stay above 35 degrees for at least 24 hours. That is a little harder to achieve in late November and December depending on where you live. Also note, that surface and air temperature can vary greatly. Do yourself a favor and spend a few bucks on a digital laser temp gun. If you have already missed your window for temperatures to remain above 35 degrees overnight you are better off waiting until spring for the weather to warm up. Nothing is as frustrating as spending your time and money on a painting project only to have cold weather ruin your work.
The key is to check your weather forecast and the data sheets on the product to make sure the two are in agreement with each other. Here are a few exterior products that can be applied down to 35 degrees.
DIYpaintGUY One problem that every DIYer runs into at some point is torn drywall paper. This happens when something that is attached to the surface is removed and the paper on the face of the drywall is torn to reveal the brown layer underneath. It usually occurs when existing wallpaper is removed or pictures hung with adhesive or tape are removed. When it happens it may seem like a small problem but it can turn into much more if not handled properly. If all the loose paper is not removed and the brown layer is not sealed it can continue to bubble even after being patched and painted. Everyday latex or oil primers will not seal this in and keep it from coming back in the future. You need to use a primer like Zinsser Gardz Problem Surface Sealer to keep this from happening.
DIYpaintGUY
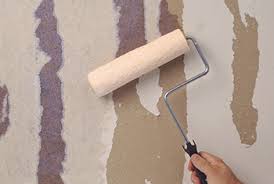
What do you do once you get to the paint store? How do you know what brand, type, color, and sheen of paint to purchase? Whether you are at a big box store, small hardware store, or paint store there are a lot of options when buying paint. If you ask 10 people a question about what type of paint to use you will probably get 10 different opinions on what they think is the right choice. There is more than one correct way to get things done. Below I will give you advice on terminology that is used and some guidance to make sure you get the best product for your application. INTERIOR or EXTERIOR
WATER BASED or OIL BASED
SHEEN
DIYpaintGUY
Touch up painting can be tricky because of all the different variables that are involved. Will the color match? Will the sheen match? Will the the texture match? These are a few of the biggest challenges. In fact, in the commercial painting world we usually figure that you will have to paint from the nearest corner to corner whenever there is a touch up needed or else it won't blend in properly. Ceilings are even more of a challenge with today's open floor plans because often times they extend for a long distance before there is a break where you can stop.
If you have a spot on the ceiling that needs to be touched up there are a few things in your favor that may help keep you from repainting the entire ceiling. Most ceilings are painted with a flat sheen which helps hide the touch up. Another positive is most people don't look at the ceilings so you might be able to live with a close match that wouldn't otherwise pass on the walls. Most ceilings are a white color but there are thousands of shades of white and figuring out the correct shade can be frustrating. The best way to get an exact match is to cut a small piece of the paint off the ceiling to take into the store for an exact color match. It can be as small as the size of a quarter. You might want to do this in a closet or utility room where it won't be so noticeable. After you get it matched you can patch the small area and touch it up. If all your ceilings are the same color you will only have to do this once. If you are unable to get a sample there is still an option you can try to improve your chance at success. A lot of times the ceilings are just a shade darker than true white. Painters often have a shot of black added to the flat white paint for the ceilings. If you don't know the color and can't get an exact color match I would try having an ounce of black added to a gallon of flat white at the paint store. This might get you close enough that it won't be noticeable to anyone that isn't looking for it. DIYpaintGUY There is an endless supply of specialty primers that can be found for any specific application that you may need. If you start buying specific primers for each project that you are working on you will not only spend a lot of money but also have a ton of leftover primer that will be laying around and often won't get used again. You can streamline these primers down into just a few that will work for almost all of your DIY projects. This will make it easier on your wallet and free up space on that already too crowded paint shelf in the basement or garage. This post will show you which primers are the most versatile and will fit your need for almost any job. 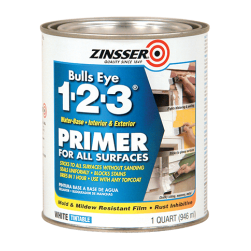 1. Zinsser BULLS-EYE 1-2-3 Water Based Primer Bulls-Eye 1-2-3 is a great all purpose primer that does a lot of things really well. It is economical and readily available at both big box stores and paint retailers. If you could only keep one primer on your paint shelf waiting for the next project this would be the one. Bulls-Eye 1-2-3 will be your workhorse primer for most DIY painting projects for the reasons noted below.
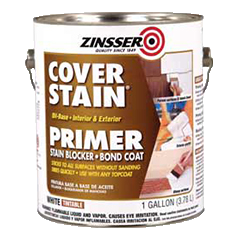 2. Zinsser COVER STAIN Oil Based Primer Cover Stain Oil Based Primer is also a good multi purpose primer that does many of the same things well as Bulls-Eye 1-2-3. Even in this age of improved water based primers sometimes you just need to use oil based primers. If you have smoke or fire damage that needs to be sealed this is the product for you. Water stains that are extensive and heavy will be sealed out better with this primer than a water based version. Metal that has more than just minor surface rust will benefit from using an oil primer to help hold out the rust. The draw back to Cover Stain Oil Based Primer is you will need thinner to clean up and the smell associated with it. Below are some of the benefits this primer can provide.
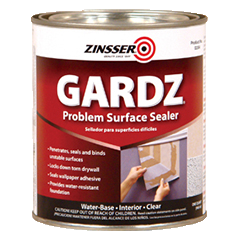 3. Zinsser Gardz Problem Surface Sealer Gardz Primer is mainly used for problem surfaces that include damaged drywall or plaster. So if you remove wallcovering or somehow damage your walls to the point that you see a brown surface under the drywall paper you need to seal this up before patching or painting. If you use a typical primer and patch over this it will bubble in the future. The correct procedure is to apply Gardz on the bare drywall surface, patch, prime the entire surface and then paint. Gardz Primer has other benefits you will see below.
DIYpaintGUY
|